How to Retrofit Auxiliary Fan Power Wiring
REMOVE ALL POWER TO THE UNIT BEFORE SERVICING
- Using a #2 phillips head screwdriver, remove grill and all unit cover screws. Remove unit cover.
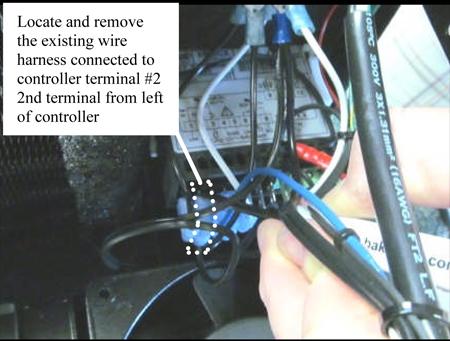
- Locate the existing wire harness that attaches to controller terminal #2 (at the front of the cooling unit). Using a small, flat-head screwdriver or needle nose pliers, pull off the quick-connect terminal from the unit controller.
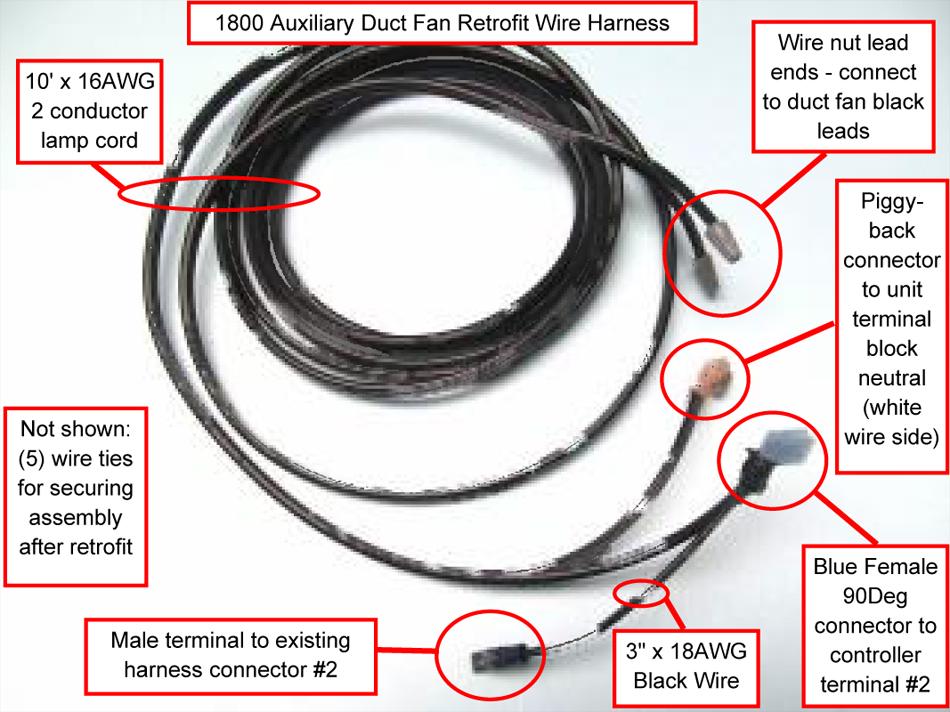
- Connect the Auxiliary Duct Fan Retrofit Harness as follows:
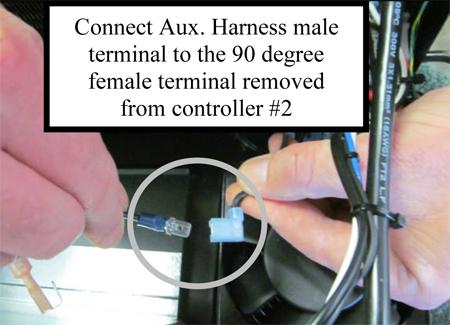
- One male quick terminal attaches to the female 90 degree terminal removed in step 2.
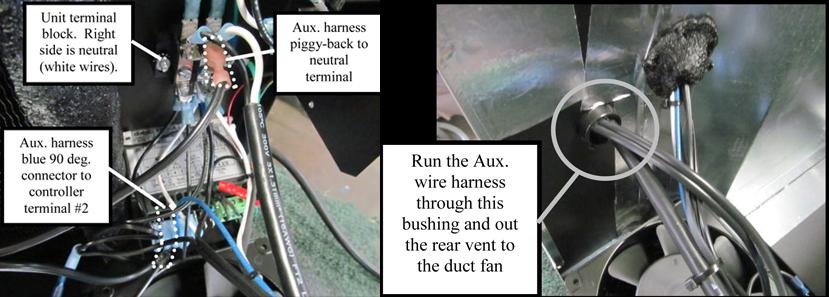
- One blue 90 degree connector on the Aux. harness connects to the open controller terminal #2.
- The piggy-back connector on the Aux. harness connects to the neutral side of the unit terminal block pictured below. If there are no open terminals to connect to, remove one of the white wires from the terminal block, attach this wire to the piggy-back terminal, and reconnect the assembly to that terminal.
- Thread the auxiliary fan wiring along the power cord, through the brushing, and out the exhaust vent opening. The brushing is sealed with cork tape. Remove the cork tape, push the wire through the bushing, and reseal when finished.
- Use the enclosed cord ties to secure the auxiliary fan wiring to the power cord. The cord ties provide strain relief for the cord, and ensure the wire will not come into contact with the evaporator fan blade.
- Replace the unit cover and grill.
- Connect the auxiliary power wiring to the two black leads of the auxiliary fan using the provided wire nuts.
When the unit power cord is plugged in and the fan icon is shown on the controller display, the inline fan will be supplied with 115V power.

We've put together some basic resources to guide you through the process of choosing a cooling unit and building a cellar.


To contact our support team, email us or call 877.726.8496.